
Making of the never easier 15 minute thrift store baby pants. My pants will be size 12-18 months. It took me about 15 minutes to complete, and that is because I stopped to eat a Hot Pocket. This is the size small Forever 21 shirt I used for the baby pants. It seemed like a waste of a good shirt to chop off the sleeves, and I had second thoughts at the Goodwill that someone might wear it for its intended young and hip purpose. After all, it was in perfect condition without signs of wear or stains, but I am glad I decided to take a chance and buy it for $3.49 for half off clothes Monday.
Step one:
Cut off the shirt sleeves under the armpit. I like the cuffed and fitted sleeves, because it fits the baby's legs better. The cuffs also give you room to grow.
An easy solution to the waistband dilemma is to use the waistband from an old pair of boys underwear. I have size 4T which works for making 12-18 month size pants. I have also thrifted kids underwear and bloomers at 25 cents just for the elastic. I swallowed my pride and bought the used undies! Next cut the waistband off the underwear, leaving room for a generous seam allowance when you sew to your pants.

Next, match the sleeves seam side together and use a pair of pants that fit as your template. Make a tiny nick at the seam, but be careful not to cut too big of a hole. The first pants I made, I cut too much here, and it was tricky lining up the seam. Now, cut from your notch upward to open the sleeves and create what will be the inseam, or seat of the pants.

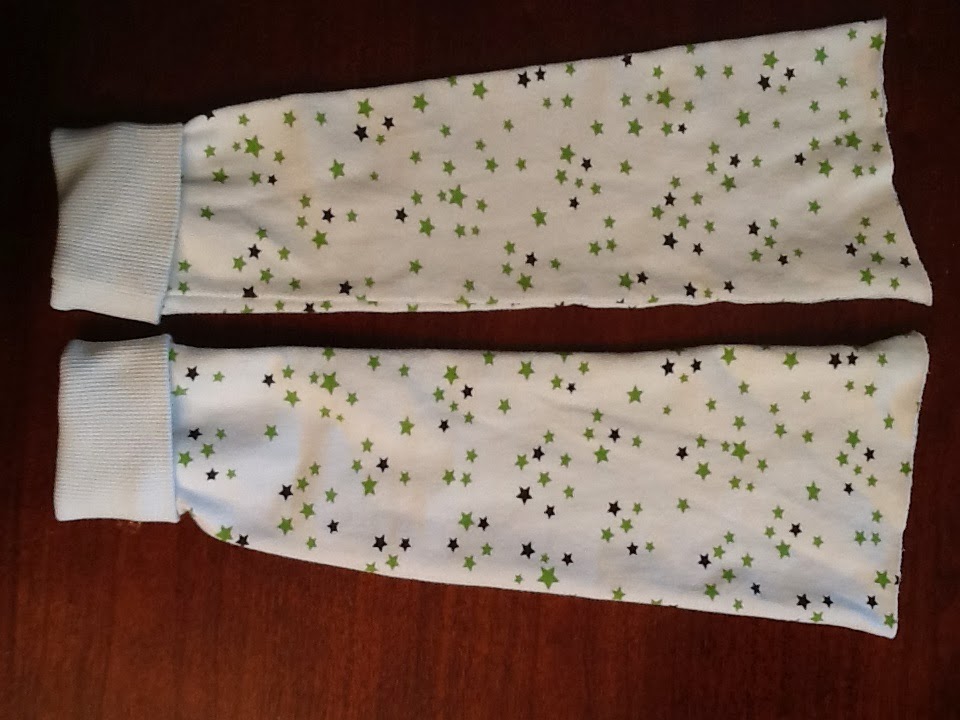
This is what your cut pieces look like after you open up the seam.

Step three:
Turn one of the sleeves inside out and insert the right sided sleeve into the inside out sleeve. Now the right sides of the fabric are facing each other. This will be the first of two seams needed to finish the pants. Make sure the existing shirt seams are lined up together. Match the corners together and sew the two pieces continuously to make the crotch of the pants. You can backstich to reinforce the crotch for added strength.

Magically, you just made pants. Now turn the pants right side out, and you can see it looks almost done. Trim the top of the pants to make it level. You can measure and be exact, if that works for you. I don't worry about it looking perfect, because my little one wears loose shirts to cover the top of the pants. You can also see my sock feet in this picture, too.

Step four:
Turn the waistband over so the right side faces the right side of the pants, and sew. If I had the time, I could embellish with a contrasting zigzag seam or a cute appliqué. Alas, my kiddo is only taking hour naps this week, and I have other things to do today. No time for embellishing. And you are finished! Throw these on the laundry pile. I think they will be cute with boots and a tunic, or just pajama pants....most likely both on the same day. Lovin' the way these turned out.

No comments:
Post a Comment